

Step 1: Create Your Razorpay QR Code
If you already have a Razorpay QR Code, you can skip this step. If you don’t have one yet, create it first using the guide below.Don't have a Razorpay QR Code?
Create your QR Code in Razorpay before continuing with this setup.Generate Razorpay QR Code →
The QR Code only needs to be created once. After it is created in Razorpay, RabbitPay can use it for UPI QR payments at checkout.
Step 2: Open RabbitPay Checkout
After your Razorpay QR Code is created, open your Shopify store and launch RabbitPay Checkout. Customers will see Pay via UPI along with the other available payment methods.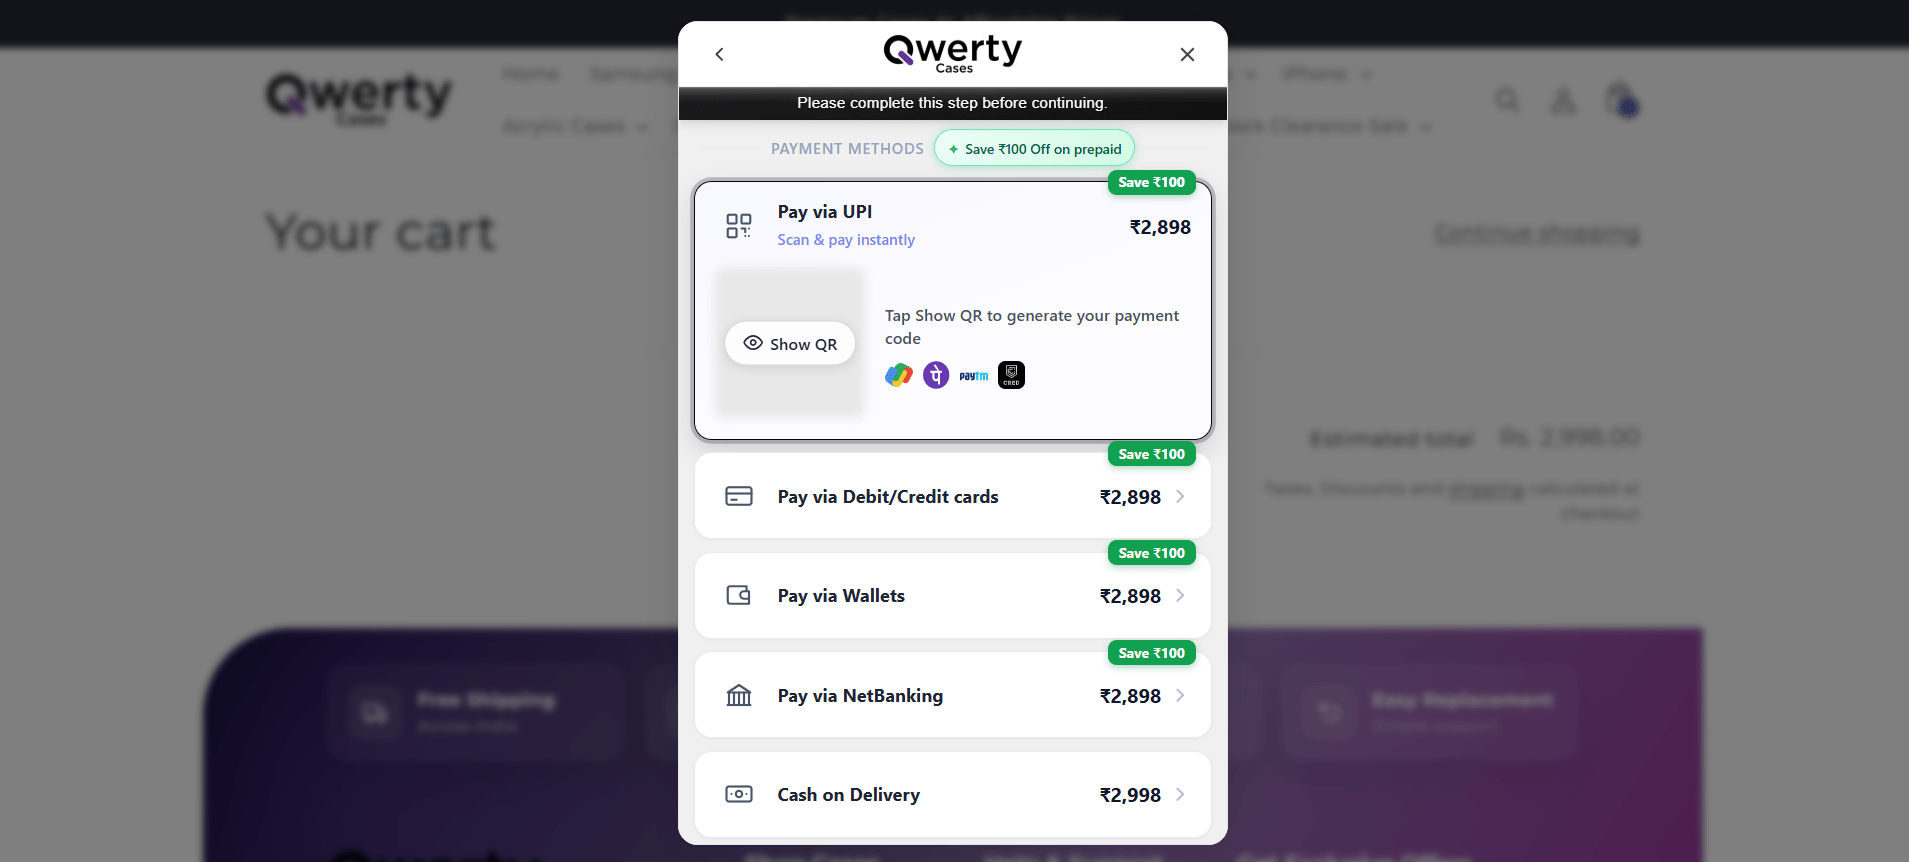
Step 3: Scan and Pay
When the customer selects Pay via UPI and click on Show QR, RabbitPay displays the Razorpay QR Code directly inside the checkout popup. The customer can:- Scan the QR Code using their UPI app.
- Confirm the payment.
- Complete the order without leaving RabbitPay Checkout.
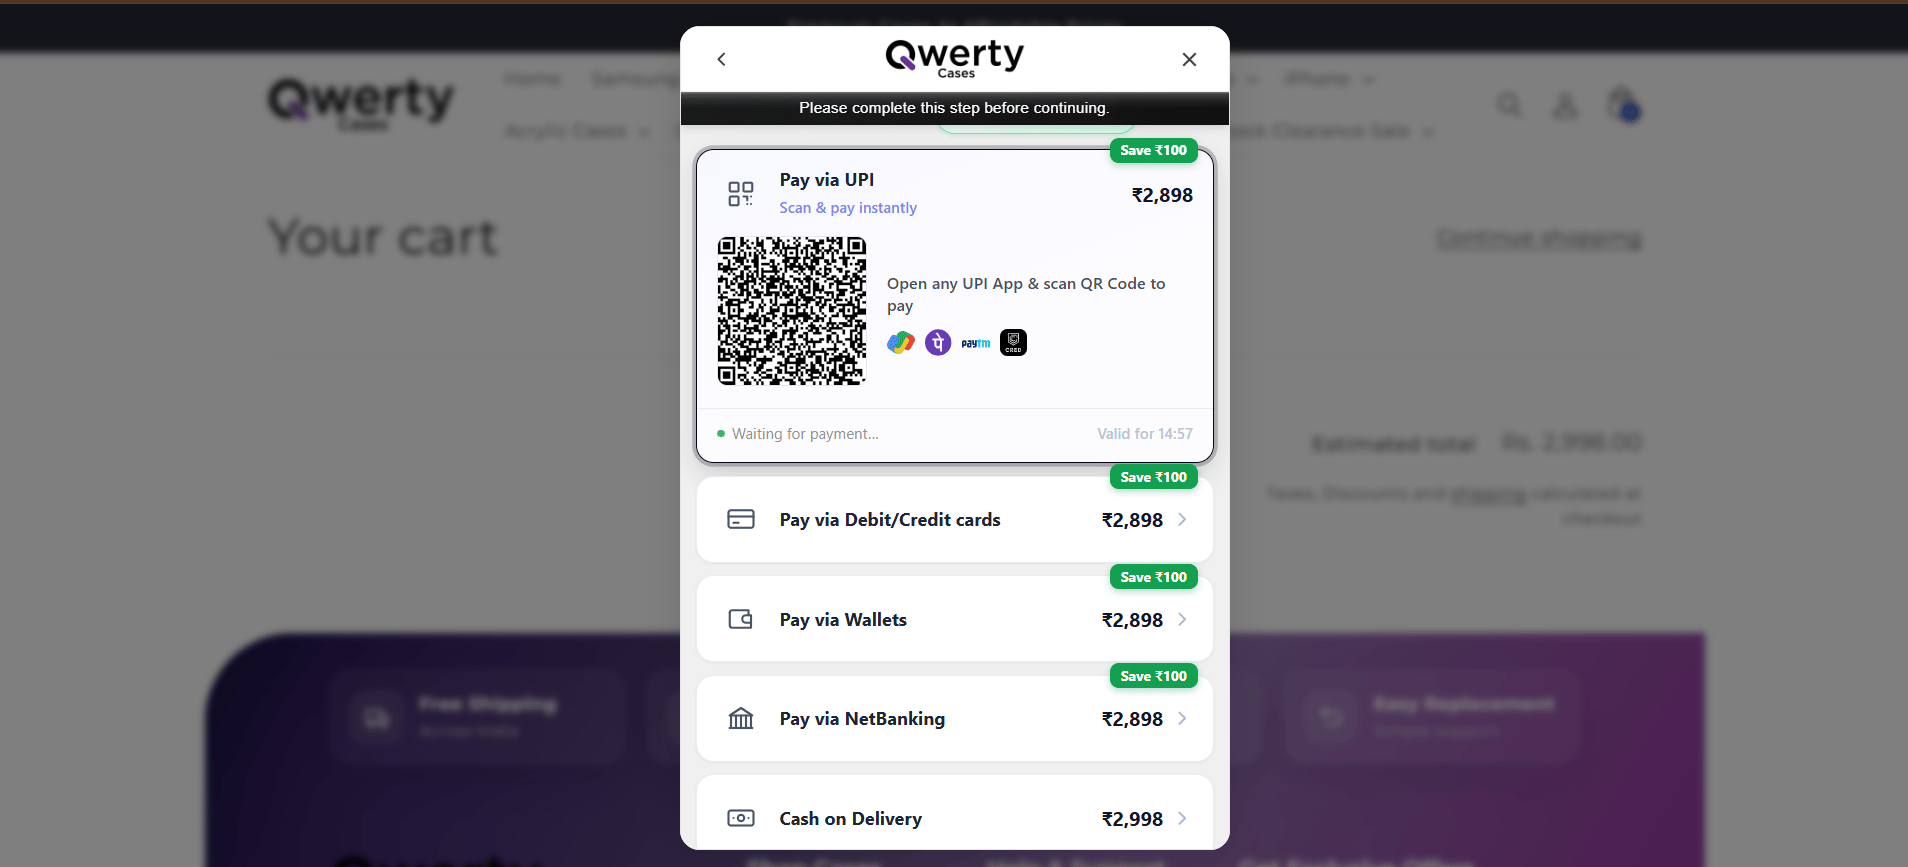
UPI QR Code displayed directly inside RabbitPay Checkout.
Why Use UPI QR Payments?
No Redirect
Customers can scan and pay directly inside RabbitPay Checkout without opening a separate payment page.
Faster Payments
Customers can quickly scan the QR Code and complete their UPI payment.
Easy UPI Experience
Customers can use their preferred UPI app to make the payment.
Better Checkout Flow
Keeping payment inside the checkout reduces extra steps and interruptions.